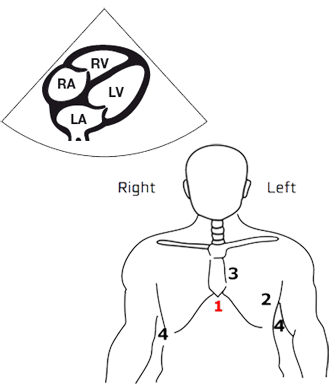
The subcostal 4-chamber view is obtained from position 1
In this view these cardiac structures can be visualized:
– Left atrium (LA)
– Right atrium (RA)
– Left ventricle (LV)
– Right ventricle (RV)
The subcostal 4-chamber view is obtained from position 1
In this view these cardiac structures can be visualized:
– Left atrium (LA)
– Right atrium (RA)
– Left ventricle (LV)
– Right ventricle (RV)
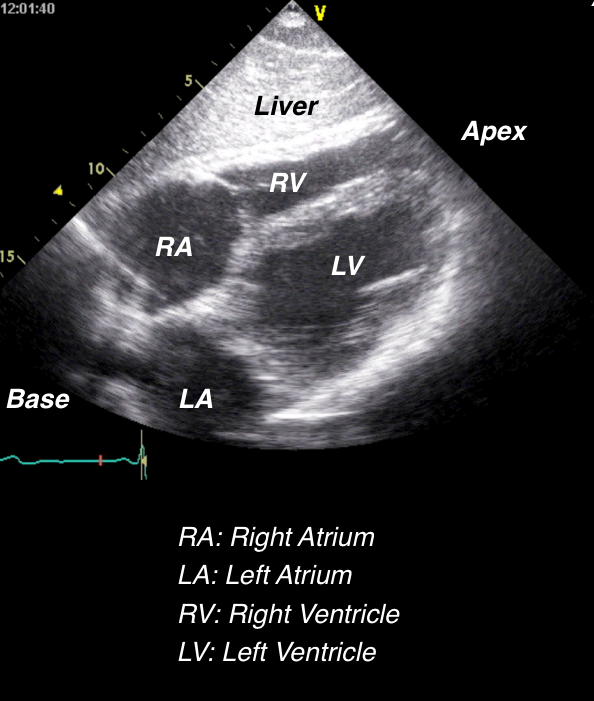
The subcostal 4 chamber view on the right shows how the image by convention should appear on the screen
Observe the liver lying “above” the heart, and the base of the heart at the left side of the screen, and the apex of the heart at the right side of the screen
The subcostal 4-chamber view is suitable for a quick qualitative evaluation of:
– Pathology
– Wall thickness
– Chamber dimensions
– Bi-ventricular function
The apical 4-chamber view is obtained from position 2
In this view these cardiac structures can be visualized:
– Left atrium (LA)
– Right atrium (RA)
– Left ventricle (LV)
– Right ventricle (RV)
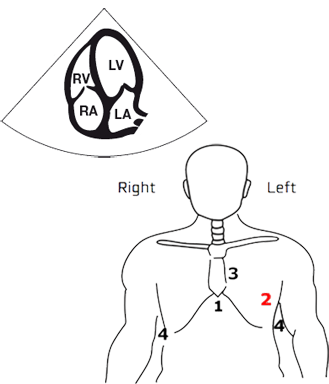
The apical 4 chamber view on the right shows how the image by convention should appear on the screen
This view is suitable for a quick qualitative evaluation of:
– Pathology
– Wall thickness
– Chamber dimensions
– Bi-ventricular function

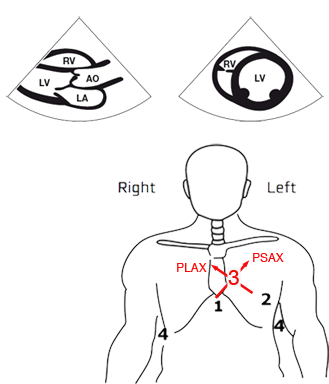
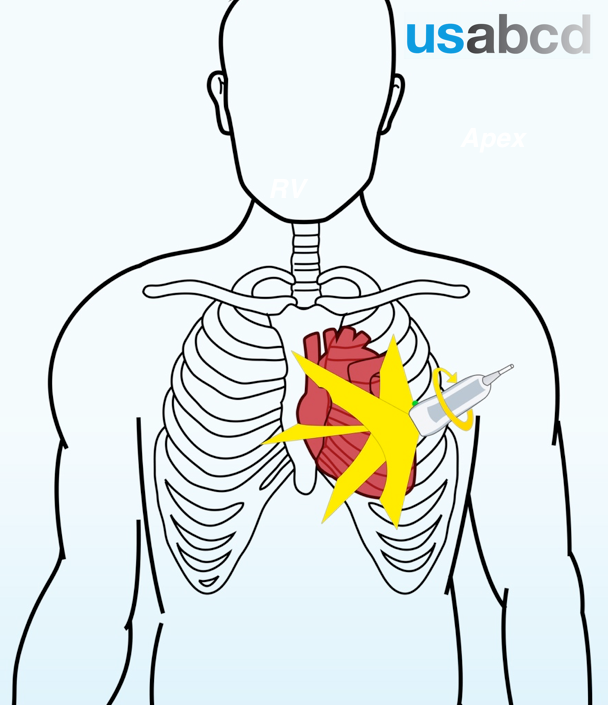
At the left parasternal position – FATE position 3 – two different views are obtained
1) The parasternal long axis view (PLAX)
2) The parasternal short axis view (PSAX)
During a “clean” rotation, the direction of the tail of the transducer should be kept 100% stable
Rotation can be:
– Right = clockwise
– Left = counterclockwise
For rotational instructions we do not make use of a secondary reference point
Example:
To obtain the correct subcostal 4 chamber view, alignment with the longitudinal axis of the heart often requires 10-20 degrees counterclockwise rotation
You will therefore often hear the supervisor saying: “Rotate the probe counterclockwise or rotate the transducer to the left”
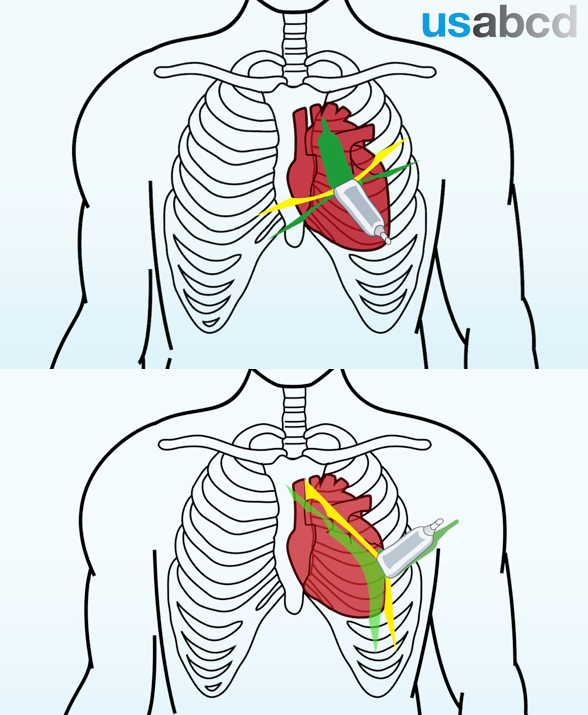
Tilting is the most difficult transducer movement to communicate because it can take place in two planes
Tilting can be:
1. upwards or downwards
2. side to side
Reference according to the tail of the transducer and a secondary reference point is important during guidance in tilting of the probe
Example:
To obtain the correct LV parasternal short axis view the probe should often have an inclination with the chest wall of 20-30 degrees
You will therefore often hear the supervisor saying: “Lift the tail of the probe towards the right shoulder of the volunteer or patient”
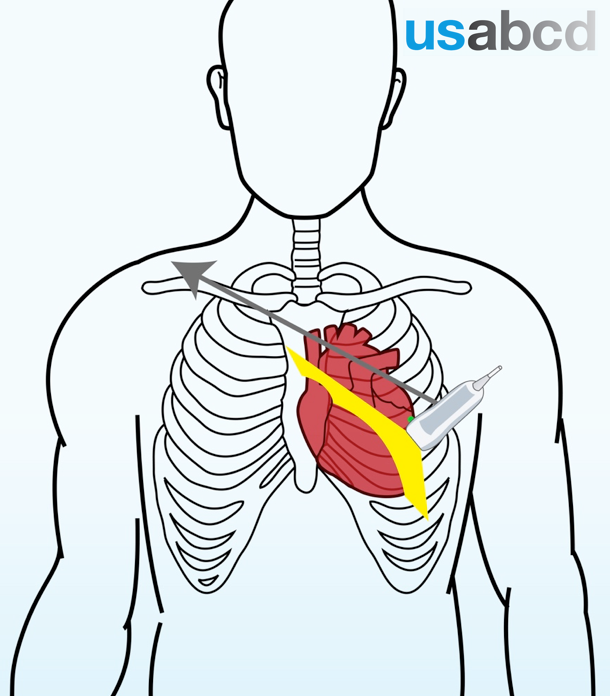
Sliding of the probe can take place in any direction
When sliding the probe no other movements should occur
For sliding instruction a secondary reference point is important
Example:
To get the correct parasternal long axis view the probe should often be closer to the sternum
You will therefore often hear the supervisor saying: “Slide towards the sternum”
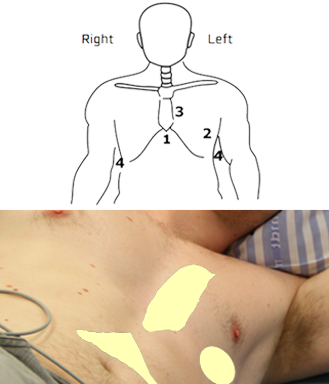
A full basic FATE examination includes images of the heart and pleura obtained from four different positions, or “windows”, on the thorax
From these positions 6 imaging views can be achieved:
– Position 1: Subcostal 4-chamber view
– Position 2: Apical 4-chamber view
– Position 3: Parasternal views. The long-axis and short-axis view
– Position 4: Pleural views. Right pleura and left pleura
This lesson will give an overview of the 6 imaging views and how to achieve them
The FATE card is made to assist your memory
The FATE card shows you:
– Where to place the transducer on the thorax for each of the four
positions
– The direction of the transducer orientation marker (OM)
– The rotation of the transducer
– The expected sonographic image
Standard cardiac abbreviations used throughout the course:
LA = left atrium
RA = right atrium
LV = left ventricle
RV = right ventricle
AO = aorta
IVS = interventricular septum
IAS = interatrial septum
You can download the FATE card from Google Play or the AppStore

