Cardiac ultrasound

Tilting


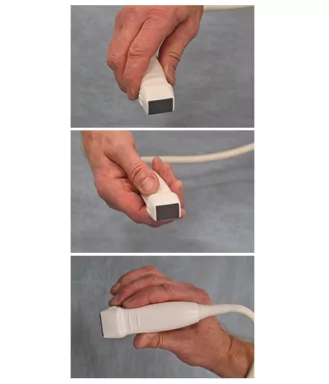
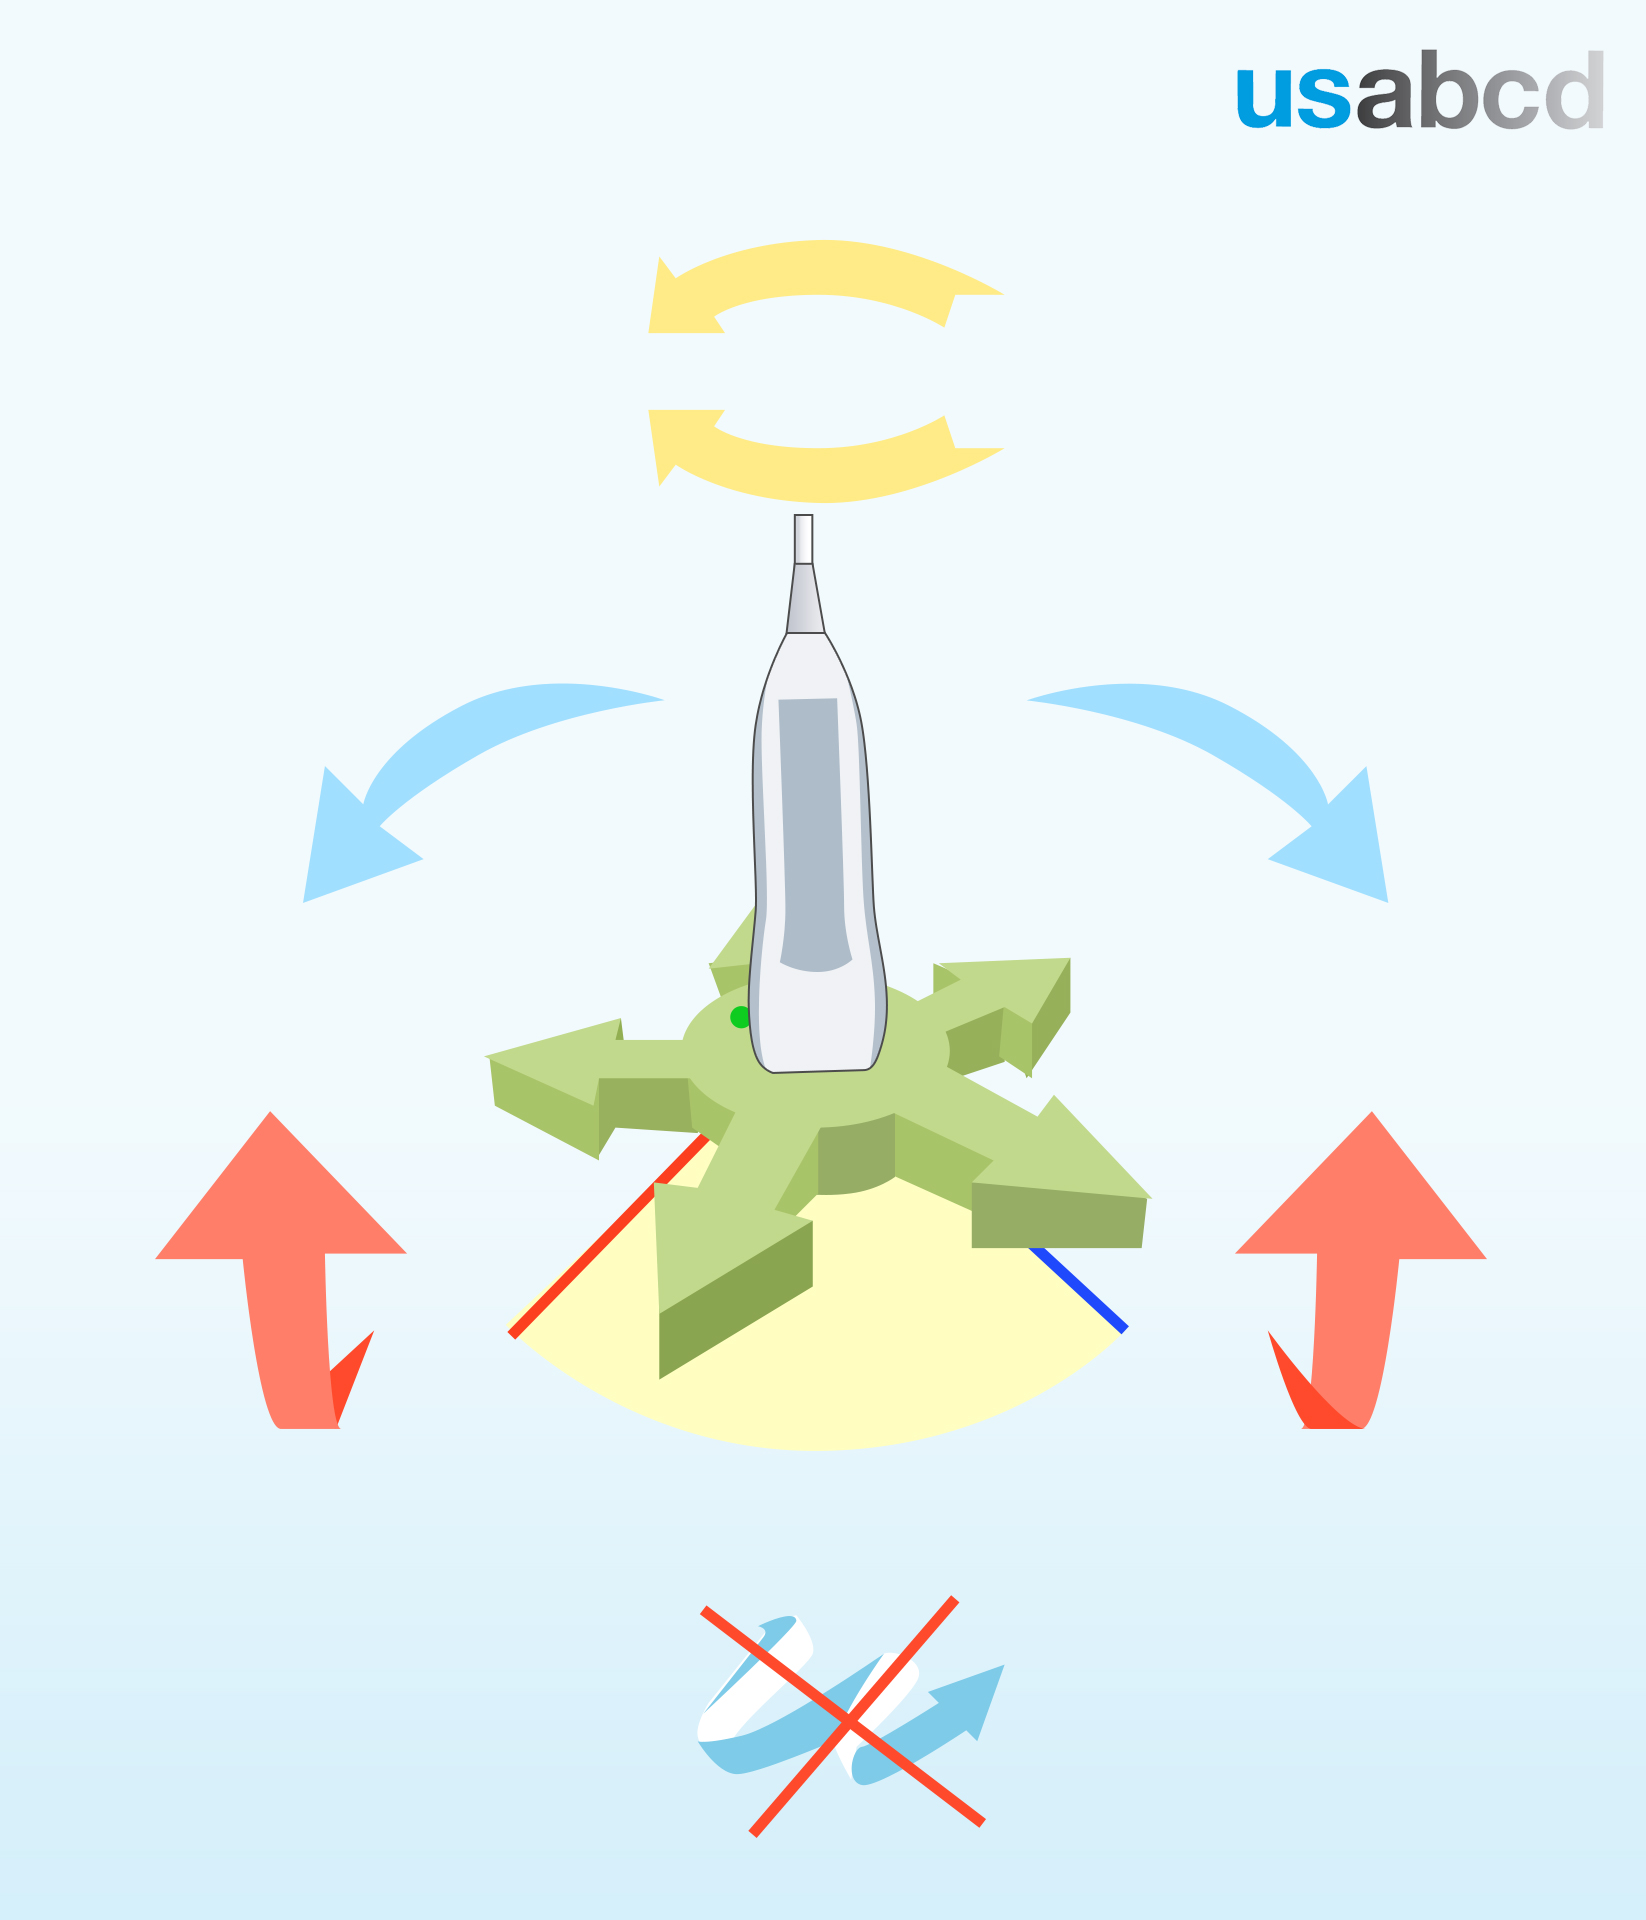
Tilting is the most difficult transducer movement to communicate because it can take place in two planes

Tilting can be:
1. upwards or downwards
2. side to side

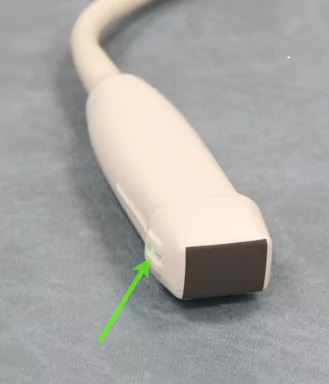
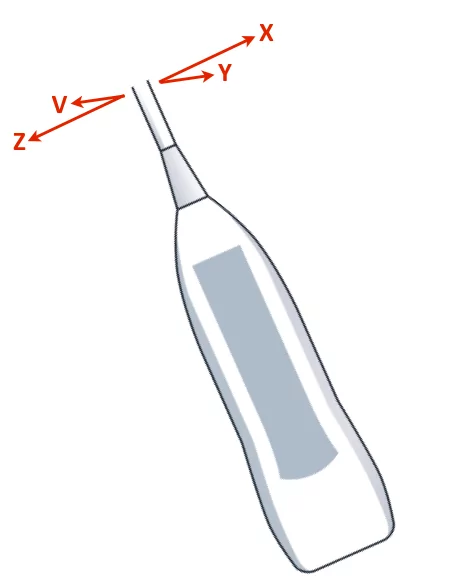
Reference according to the tail of the transducer and a secondary reference point is important during guidance in tilting of the probe

Example:
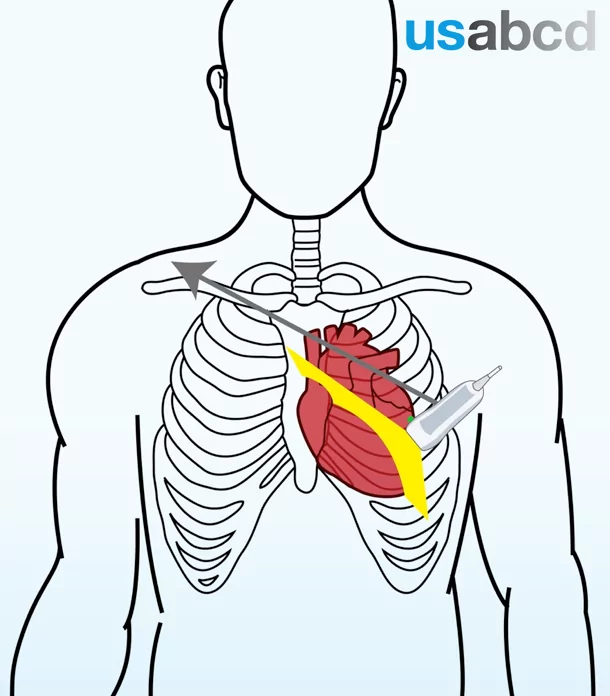
To obtain the correct LV parasternal short axis view the probe should often have an inclination with the chest wall of 20-30 degrees

You will therefore often hear the supervisor saying: “Lift the tail of the probe towards the right shoulder of the volunteer or patient”

Image missing
Top: tilting upwards/downwards
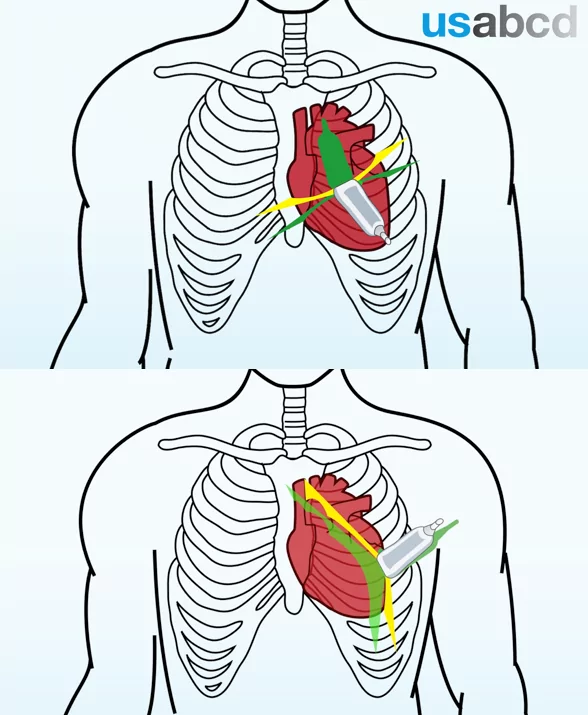
Bottom: tilting side to side

Sliding


Sliding of the probe can take place in any direction

When sliding the probe no other movements should occur

For sliding instruction a secondary reference point is important

Example:
To get the correct parasternal long axis view the probe should often be closer to the sternum

You will therefore often hear the supervisor saying: “Slide towards the sternum”

Image missing
Sliding exemplified in the parasternal long axis view

The sector and its orientation


The image is generated by the transducer and the ultrasound system and then displayed on the screen

FATE and cardiac ultrasound employs multifrequency phased array probes that display the image as a sector on the screen. The sector is demarcated by the two radii and the arc. In the figure the two radii of the sector are red and blue

The red and the blue radii diverge from the probe at the top of the monitor (the skin surface)

The orientation indicator (OI) is at the right side of the screen by convention in cardiac ultrasound (contrary to all other clinical ultrasound applications where the OI is placed on the left side of the screen)

The blue and red radii on the probe sector always correspond to the radii on the screen

The probe can be moved in three dimensions, but the screen stays neutral

Image missing
The ultrasound sector produced by the probe and the corresponding ultrasound image on the screen. Notice the colours of US sector (red/blue) correspond to the colours of the screen.

The ultrasound probe (transducer) for FATE


The FATE examination requires a cardiac phased array probe

The probe scans with low frequency band width permitting good penetration and better visualisation of deeper located structures

We recommend a 1.5-4 MHz multifrequency phased array transducer

Image missing
Different ultrasound transducers, all made for special purposes. The hand is holding the multifrequency phased array transducer which is the preferred type in cardiac examinations.

The orientation marker on the transducer


The probe is fitted with an orientation marker (OM)

On the image the OM is indicated by a green arrow

The OM facilitates the correct orientation of the probe on the patient

Image missing
The OM (green arrow) has to be oriented in correct relationship with the corresponding orientation indicator (OI) on the monitor

How to hold the probe properly


There are two ways to hold the probe properly during the FATE examination

The screw driver grip:
With either the back or the palm of the operator hand placed on the patient during scanning

The pencil or lipstick grip:
The grip on the probe is made with the first and the second digit
The third digit to fifth digit are placed on the skin during scanning to stabilise the probe

Image missing
The screwdriver grip is seen in the two top images, and the pencil grip in the bottom image

Manipulating the probe


A terminology to describe the movement of the probe during scanning is important in order to optimise the image

During the workshop it makes it easier for the supervisor to give instructions without touching the probe which is crucial for the novice in order to achieve practical skill

There are many available descriptions of the method of manipulation of the probe

We recommend using:
1. rotate
2. tilt
3. slide

These movements are applicable to all scanning locations

As a novice – always move the probe in only one direction at a time

Image missing
Movements in three different spatial directions.The icon at the bottom indicates that movement should only take place in one plane at the time.

Instruction in manipulation of the probe


During the workshops the supervisors are encouraged to give instructions with reference to the tail of the transducer and a secondary reference point when appropriate

Examples of secondary reference points:
1. Anatomical landmarks in relation to the volunteer or patient
2. Physical landmarks like the bed
3. Spatial orientation: left/right – upwards/downwards – medial/lateral

When complying with an instruction, never do any movements in other directions

Image missing
Transducer manipulations with reference to the tail of the probe and four different secondary reference points: X, Y, Z ,V

Focus Assessed Transthoracic Echocardiography (FATE)


FATE is an acronym for “Focus Assessed Transthoracic Echocardiography”

FATE is the original focused echo protocol for all physicians – practiced since 1989

FATE is easily and quickly learned and can be applied in all clinical scenarios – e.g. pre-, intra-, and postoperatively, intensive care medicine, emergencies, and resuscitation

FATE can be performed with the patient in the sitting position

The FATE card (see figure) also encompasses quick guidance in the interpretation of the echocardiographic findings and their application in the clinical context

FATE can be performed in all locations: OR, ICU, emergency room, pre-hospital, ambulance, in-flight, patient’s home – there are no limitations

Image missing
You can download the FATE card from: usabcd.org/FATE-card

FATE levels of training


There are currently two available levels of FATE training

Basic FATE (Level 1)
Based on two-dimensional imaging of the four easiest cardiac views, IVC and pleural supplemented by M-mode, the subject learns cardiac function and the most important pathology seen in critical care

No precourse qualifications are required

Advanced FATE (Level 2)
Basic FATE supplemented with extended cardiac views and Doppler ultrasound for cardiac output and pressure measurements, together with assessment of LV diastolic function. This module requires completion of Basic FATE level of training or a similar level

Image missing
Requirements for Level 1 certification as suggested by USabcd