lang-en

XX 45 – How to make your own gelatine training phantom

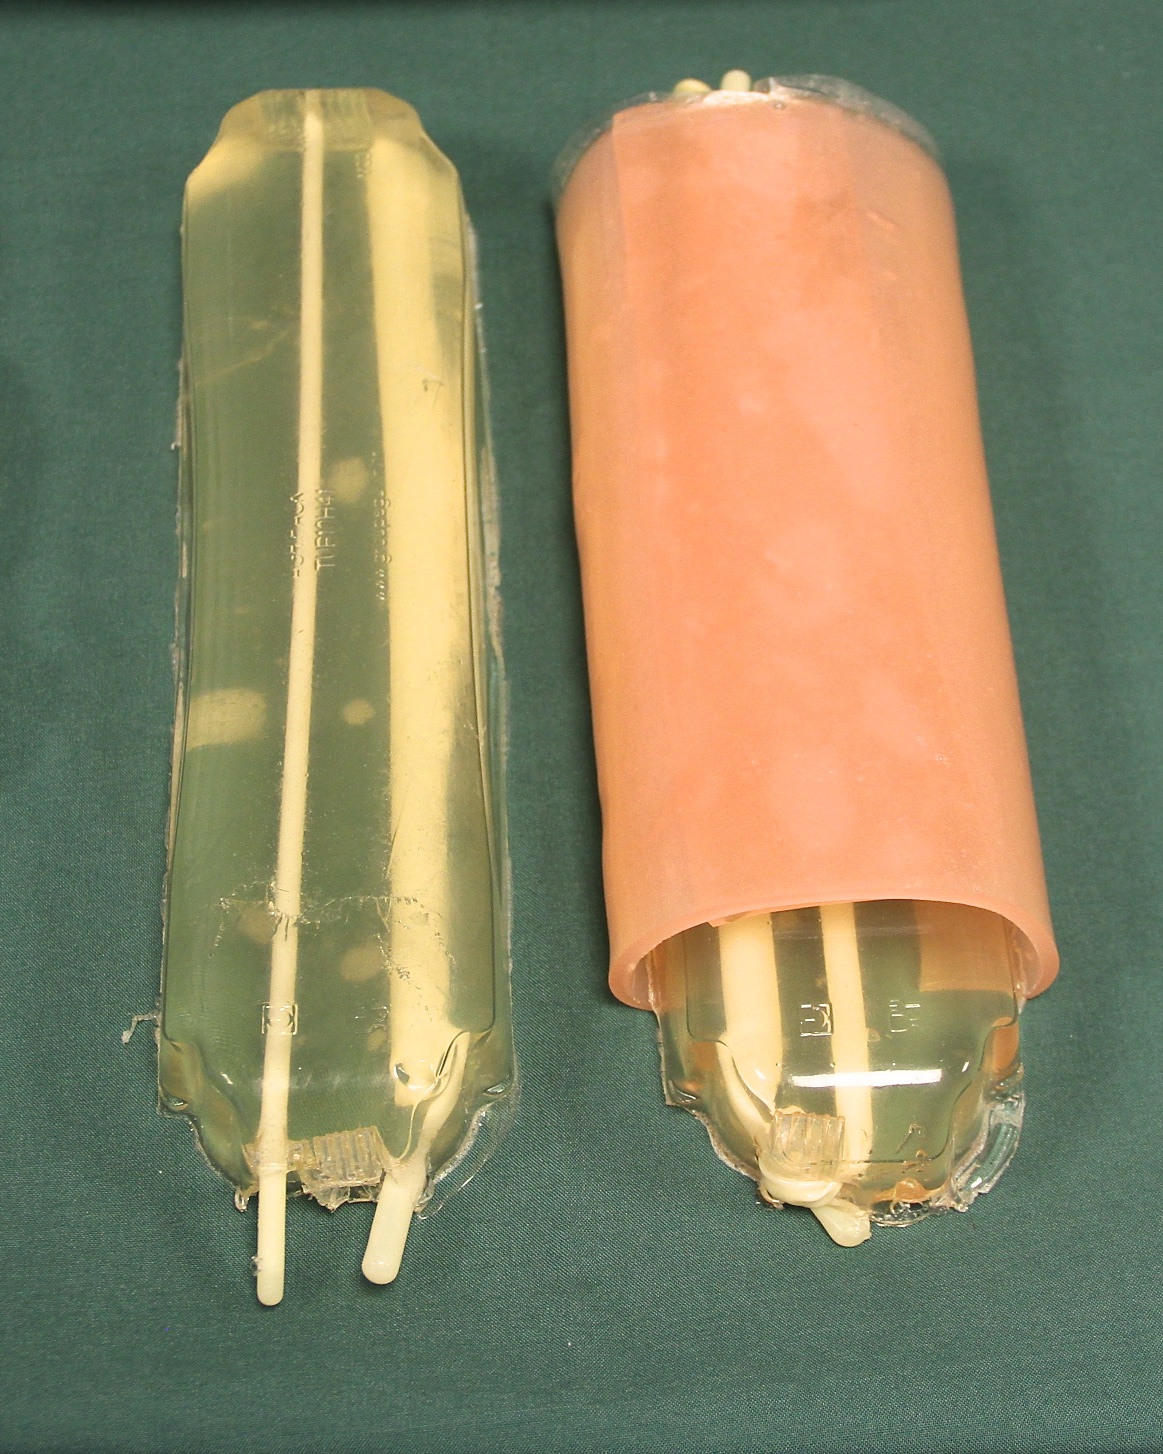
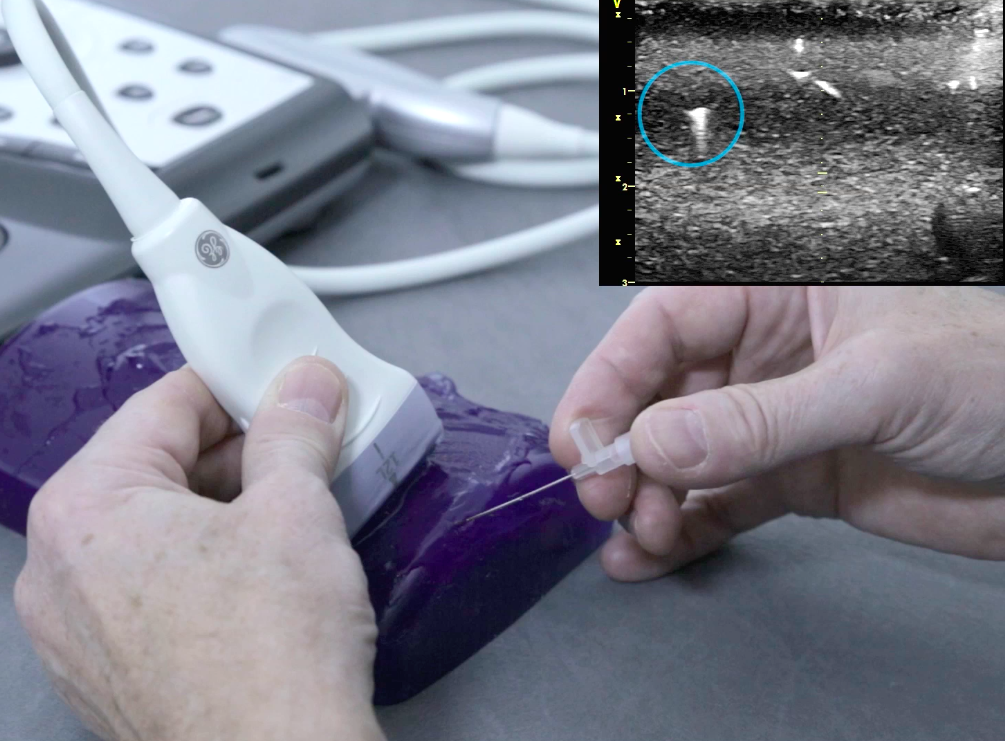
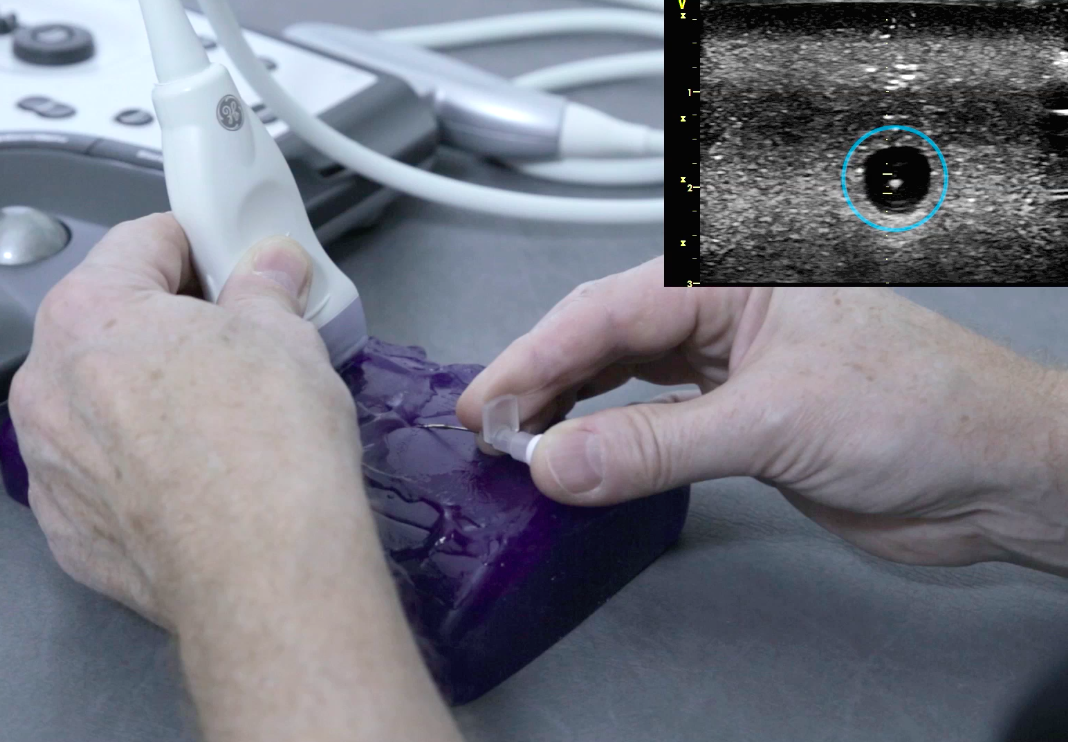
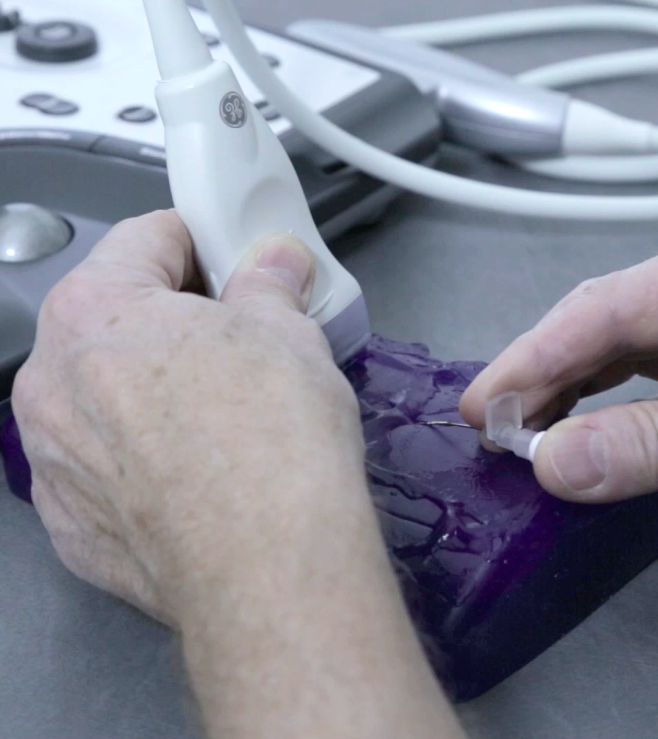
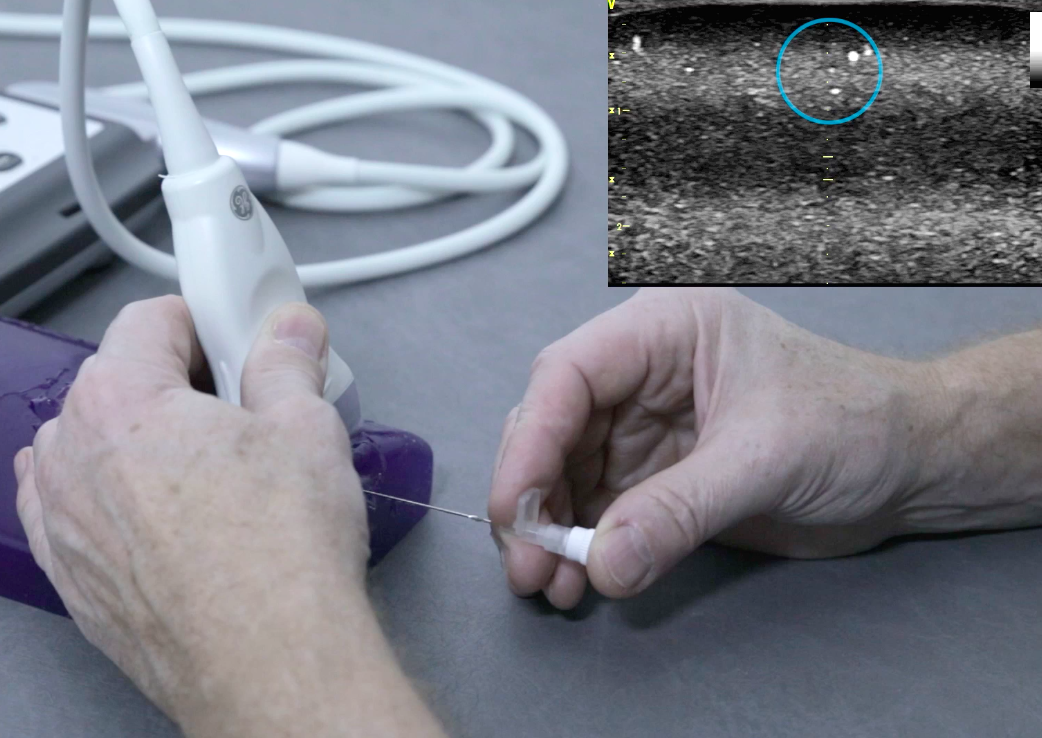
You can make your own training model using a mixture of warm water and 15% pure gelatine*

This creates a realistic soft tissue echogenicity and allows a good sonographic transmission

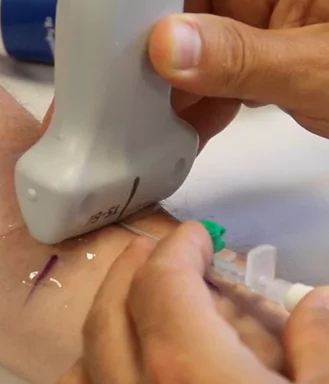
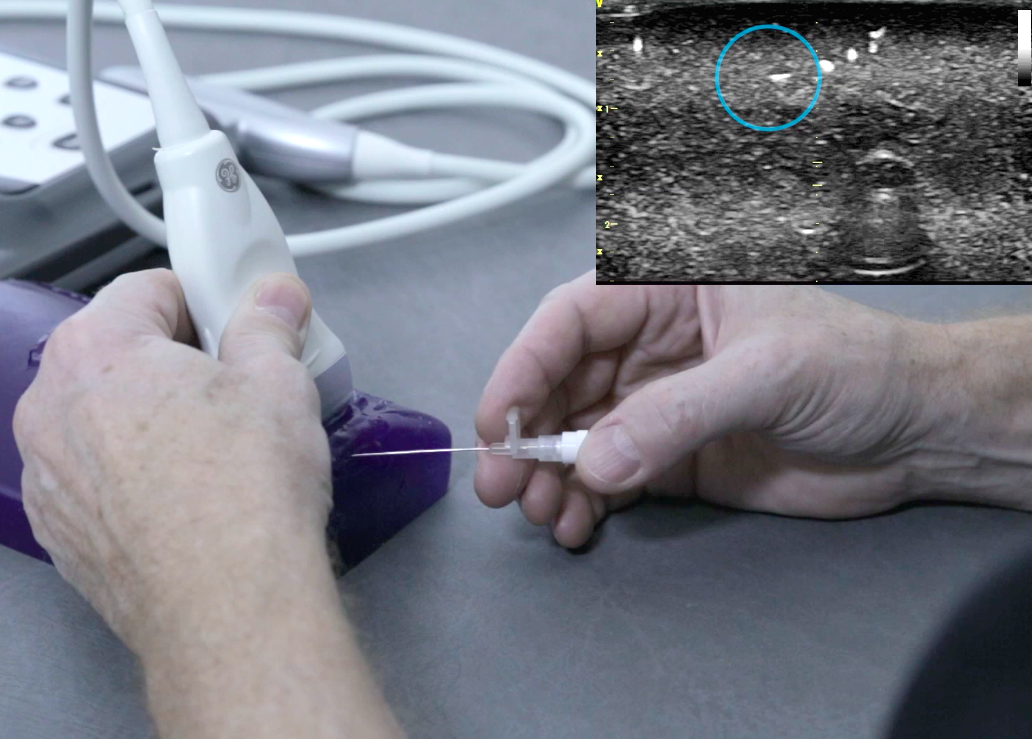
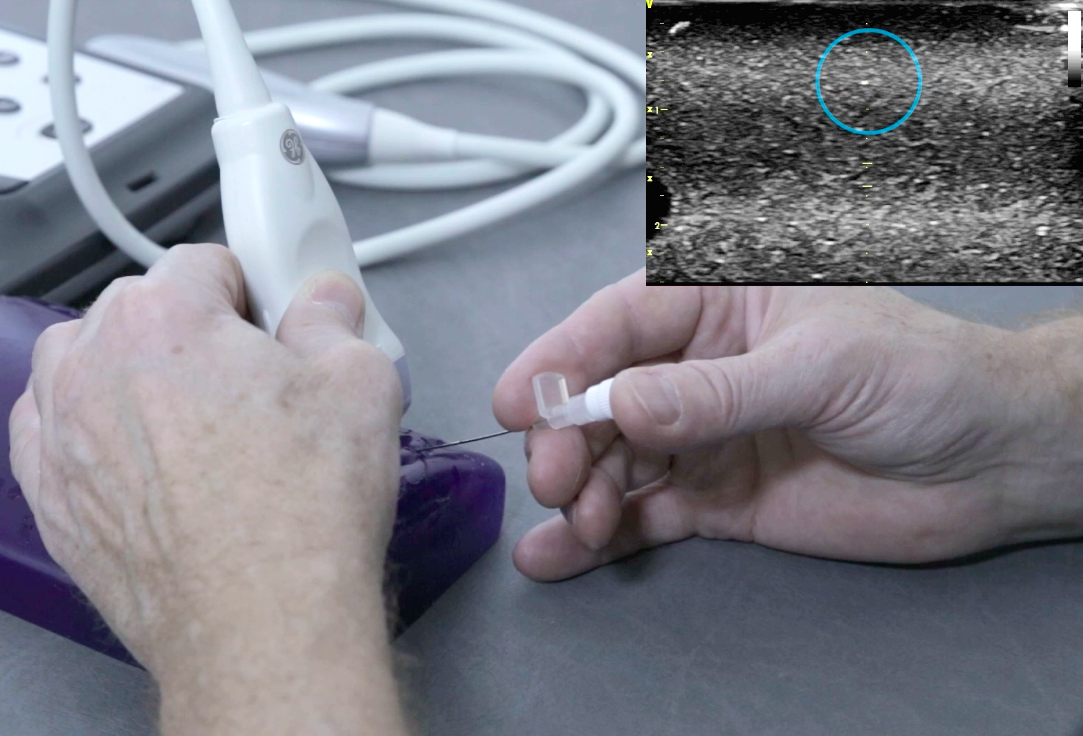
The model can be made in a rectangular container with one or more balloons filled with gelatine. These provide the targets for the needle insertion

The surface of the phantom can be covered by non-transparent gelatine layer made by adding flour to the liquid gelatine mixture in order to make the targets invisible to the human eye

*E.g. Gelita Gelatine, from GELITA Sweden, SE-264 23 Klippan, Sweden. http://www.gelita.com

Image missing
Homemade gelatine vascular phantoms with embedded “veins” (balloons filled with gelatine). The phantom to the right is wrapped with non-transparent but sonographic transmissible gelatine “skin”.

Patient procedures

DNTP can be applied successfully in different patient procedures. You will now be shown how to:

• Insert an intravenous vascular cannula using DNTP
• Insert an arterial catheter using DNTP

Please note that the procedures described are examples of how they can be performed.

Always use your own hospital’s procedures. The procedures shown are used at your own risk and USabcd can take no responsibility for any hazards of procedures performed by yourself

Image missing
Image showing the optimal placement of transducer and needle for DNTP

XX 39 – Exercise 2: Tracking the needle tip sideways

The learning objective of exercise 2 is to train the DNTP technique sideways in the horizontal plane: how to navigate the needle tip left and right

When you have control of this, you will be able to place and move the needle tip to where you want in the horizontal plane

Click on the VIDEO CLIP button to view the video

Image missing
The video demonstrates the DNTP technique when a needle is tracked sideways into the phantom.

Observe the “coming and going” more and more to the left of the screen as the needle is moved further and further into the phantom

XX 40 – Exercise 3: Tracking the needle tip vertically

The learning objective of exercise 3 is to train the DNTP technique in the vertical plane: how to navigate the needle tip up and down

When you have control of this, you will be able to place and move the needle tip to where you want in the vertical plane

Click on the VIDEO CLIP button to view the video

Image missing
The video demonstrates the DNTP technique when a needle is tracked downwards into the phantom.

Observe the “coming and going” deeper and deeper of the screen as the needle is moved further and further into the phantom

XX 41 – Exercise 4: Tracking the needle tip diagonally

The learning objective of exercise 4 is to train the DNTP technique in both the horizontal and vertical plane at the same time: how to navigate the needle tip sideways and up and down

By doing this you will be able to place the needle tip wherever you want, and steer it to the right place.

Click on the VIDEO CLIP button to view the video

Image missing
The video demonstrates the DNTP technique when a needle is tracked downwards to the left into the phantom.

Observe the “coming and going” deeper and more left of the screen as the needle is moved further and further into the phantom

XX 42 – Exercise 5: Tracking the needle tip sideways and vertically with a target

The learning objective of exercise 5 is to use the DNTP technique skill learned in exercise 1-4 in combination to catch a target directly under the needle – primarily to track and steer the needle tip in a vertical plane to a target within the phantom

Track the whole needle into the vessel, and not just needle tip into the vessel

Click on the VIDEO CLIP button to view the video

Image missing
The video demonstrates the DNTP technique when a needle is tracked directly downwards into a vessel in the phantom

Observe the “coming and going” deeper and deeper as the needle is moved further and further into the phantom, and into the vessel. Guide the needle tip a few cm into the vessel to assure the position of the needle inside the vessel

XX 35 – Stabilizing the transducer and needle

It is important to keep the transducer and needle stable and avoid unintended movements of the needle tip during the DNTP procedure

Some target vessels are less than 1 mm in diameter, which demands a very stable procedure

This is best done by resting both hands and elbows, and only using wrist and fingers for moving the transducer and needle. Movements of the arms are too inaccurate

Image missing
The video demonstrates how to stabilize your arms and shows how alternating small movements of the needle and transducer only require movement of the wrist and fingers

This allows very subtle and well controlled movements required for cannulation even of tiny vessels e.g. in neonates

Guidance markers

When the target vessel appears in the middle of the US screen, it is situated directly underneath the center of the transducer. Knowledge of this is the only aid the operator has, when deciding where to insert the needle

Some ultrasound machines has corresponding guidance markers on the US screen and transducer which improves the accuracy of needle placement during DNTP

We recommend that ultrasound systems used for DNTP utilise integrated guidance markers to optimise the accuracy of needle placement

Image missing
Ultrasound machine with three guide markings on the transducer and three corresponding guide lines on the screen.

XX 37 – 6 exercises that will teach you the DNTP technique

The next slides show short 6 exercises that will teach you the DNTP technique

1) Moving the needle tip in and out of the scanner plane
2) Moving and tracking the needle left and right in the horizontal plane
3) Moving and tracking the needle tip up and down in the vertical plane
4) Moving the needle both vertically and horizontally without a target
5) Moving the needle vertically towards a target
6) Moving the needle both vertically and horizontally with a target

Watch the video clips and practice the exercises with your own equipment and vascular phantom until you have full control of the needle tip in all directions and the alternating small movements of the transducer and the needle

Image missing
The image shows a training exercise using a Blue Phantom training block

XX 38 – Exercise 1: Tracking the needle tip horizontally

The learning objective of exercise 1 is to train the tracking technique: how to navigate the needle tip into the phantom by small alternating movements of the needle and the transducer

It is essential to get full control of this technique before proceeding to the next exercises

Important:
• Look at the needle tip when you insert it into the phantom
• Ensure that the needle does not hit the transducer by moving the needle downwards into the phantom
• Now watch the screen and not the needle and transducer – this is a typical novice error
• Move the needle forward until it appears on screen, then move the transducer until
the needle tip disappears and repeat this in small alternating movements

Click on the VIDEO CLIP button to view the video

Image missing
The video demonstrates the DNTP technique when a needle is tracked horizontally into the phantom.

Observe the very small alternating movements of the transducer and the needle, and the “coming and going” of the needle tip on the ultrasound screen (the blue circle in the top right corner)